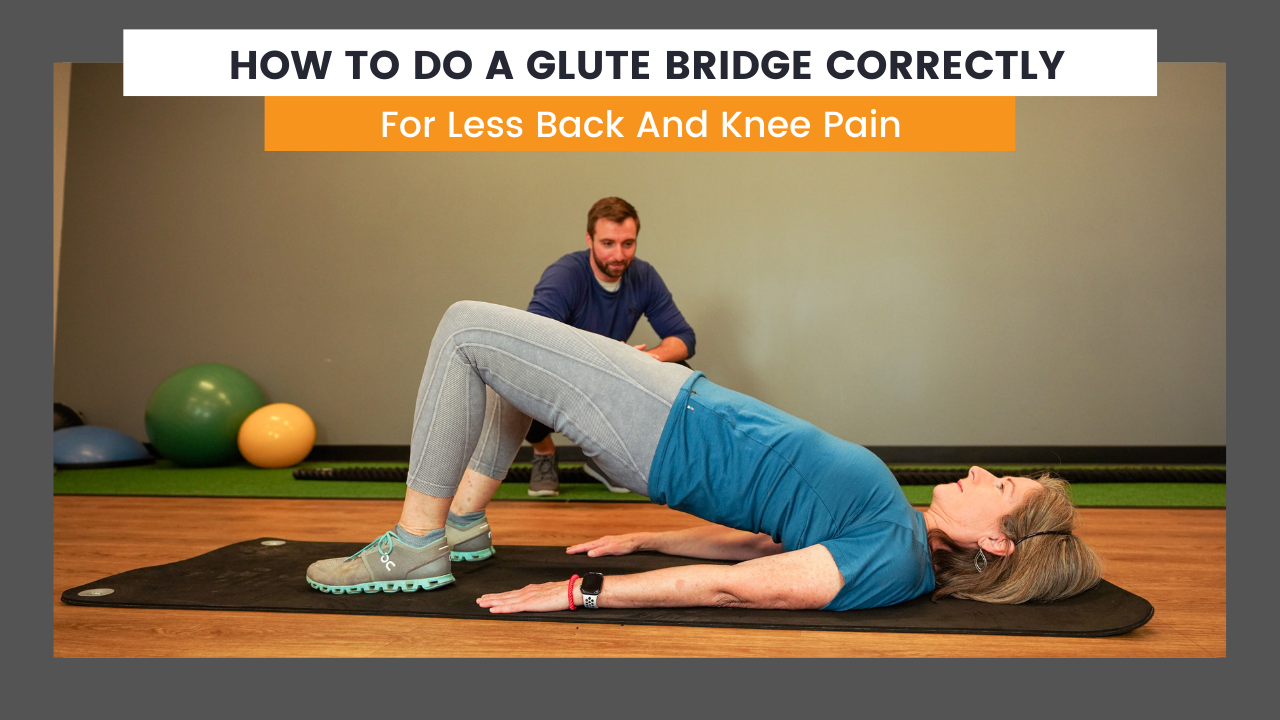
How To Do A Glute Bridge Correctly
Building stronger glutes is one of the best things you can do to solve chronic pain and maintain your lifestyle as your get older. It's also important that your strengthening routine doesn't aggravate your joint pain. I love the bridge exercise because it’s safe, it’s effective, and it’s simple. However, for such a simple movement there is a lot that can go wrong. In this article we'll show you how to do a glute bridge correctly, show you common mistakes, and provide a few variations to help you master the Glute Bridge exercise.
How To Do A Glute Bridge Exercise
Ready to get started with the Glute Bridge? Master the move by following the steps below from Dr. Carl Baird. Then keep reading to learn how to fix common mistakes and learn new variations. To perform the Glute Bridge:
Laying on your back, with knees bent a feet flat on the floor.
Put arms on floor about 45 degree angle from body with palms face down. Brace your abs.
Lightly press palms into the floor to creat some upper body tension.
Press through your feet to raise hips up off the ground.
Squeeze glutes at the top to get into full hip extension
Lower hips back to the ground.
Repeat.
Watch the video below to learn more about the Glute Bridge Exercise w/ Dr. Baird
Common Mistakes And How To Fix Them
Feet Too Far Out
Don't start with your feet too far out in front of you. This places more stress on your hamstrings and your low back. To fix, simply pull your heels closer to your body.
2. Feet Too Close In
If you're feeling a pull on your quads (front of thighs), it may mean your feet are too close to your body. To fix, move your feet slightly more out in front of you. The perfect position is when your shins are perpendicular to ground at the top of the position.
3. Pinning Back On The Ground
Many people will try to 'flatten' their lower back arch before performing the bridge. The fix, keep yoru neutral spine position. Hold a small abdominal brace to hold your spine in the position as your perform the movement.
Not Performing Through Full Range of Motion
To get the most out of this exercise, it's important to take your hips through the entire range of motion. If youre nervous about an injury or new to this exercise you may have a tendency to stop early. To fix, make sure you squeeze your glutes at the top of the movement.
Glute Bridge Variations
Once you’ve mastered the glute bridge exercise, you can further challenge yourself with different variations. Here are just a few more fun ways to use the glute bridge to build strength in your glutes and hamstrings.
The Glute Bridge Squeeze
Create even more body tension by placing a yoga block or ball inbetween your legs and squeezing inwards. This tension helps to limit impact on your joints and a great way to progress your bridge exercise.
The Banded Glute Bridge
The best way to build even more strength is to add resistance to your movements. Add resistance to your bridge by placing a resistance band over your knees and performing the exercise.
The Butterfly Bridge
Incoporate the entire glute complex (glute max, glute med, and glut min) with the Butterfly Bridge. Place a small circiular band over your knees and perform 10 'butterflies' at the top of the movement. Be sure your hips don't drop.
Glute Bridge March
The single leg variation of the bridge helps improve any side to side muscle imbalances that may exist. The glute bridge march is a great way to transition into the single leg bridge.
Hip Thrusts
Hip thrusts are a more challenging variation of the bridge that can be used to further challenge your strength. Place your upper back on a bench/chair/couch and perform the same hinge/bride movement. Place weight on your hips for an even further challenge.
The glute bridge is the safest and most effective exercise to build hip strength and limit impact that goes through our joints. For a more complete understanding of how to move without pain and build strength without stressing your joints, be sure to download our free program ‘Solving Pain With Strength


