
The Best Hip Hinge Progressions For Less Joint Pain
The hip hinge exercise is THE foundational movement on which all others are built. Learning, understanding, and practicing the hinge will save you from YEARS of joint pain. Not only do we use this movement as we move throughout our day, it is used in many of the most important weight training movements (including the lift and squat). The following hip hinge progressions will allow you to build confidence in your movement without aggravating joint pain.
How To Hip Hinge
Before moving into different hip hinge prorgessions, let's start with the basics. Follow these step-by-step instructions to learn the what the traditional hip hinge looks like:
Start with feet hip width apart and loose knees (not locked out).
Perform a an abdominal brace to help control any spinal movement.
Initiate the movement by reaching your hips towards the wall behind you.
Allow your knees to bend without actively bending them (don’t squat).
Keep a neutral spine (placing a pole on your back is a good reminder).
Stop the movementment the second you feel tension in your hamstrings.
Bring hips back to the starting position and repeat.

Hip Hinge Progressions
For such a simple movement there are many things to pay attention to while performing the hip hinge. To avoid making joint pain worse, I strongly recommend building a solid movement foundation before trying anything too difficult. Find the right starting point with the variations below.
1. The Hero Squat
The Hero Squat is a very entry level hip hinge progression for anyone who is having a hard time reaching their hips back. By taking the knees out of the equation we are forced to reach our hips back towards our heels.
2. Butt Taps
Progressing to a standing position, we're still working on 'unlocking the hips' with the next exercise, The Butt Tap. Having the wall as a cue and 'reaching' back with your hips is a great way to teach clients how to reach back with their hips.
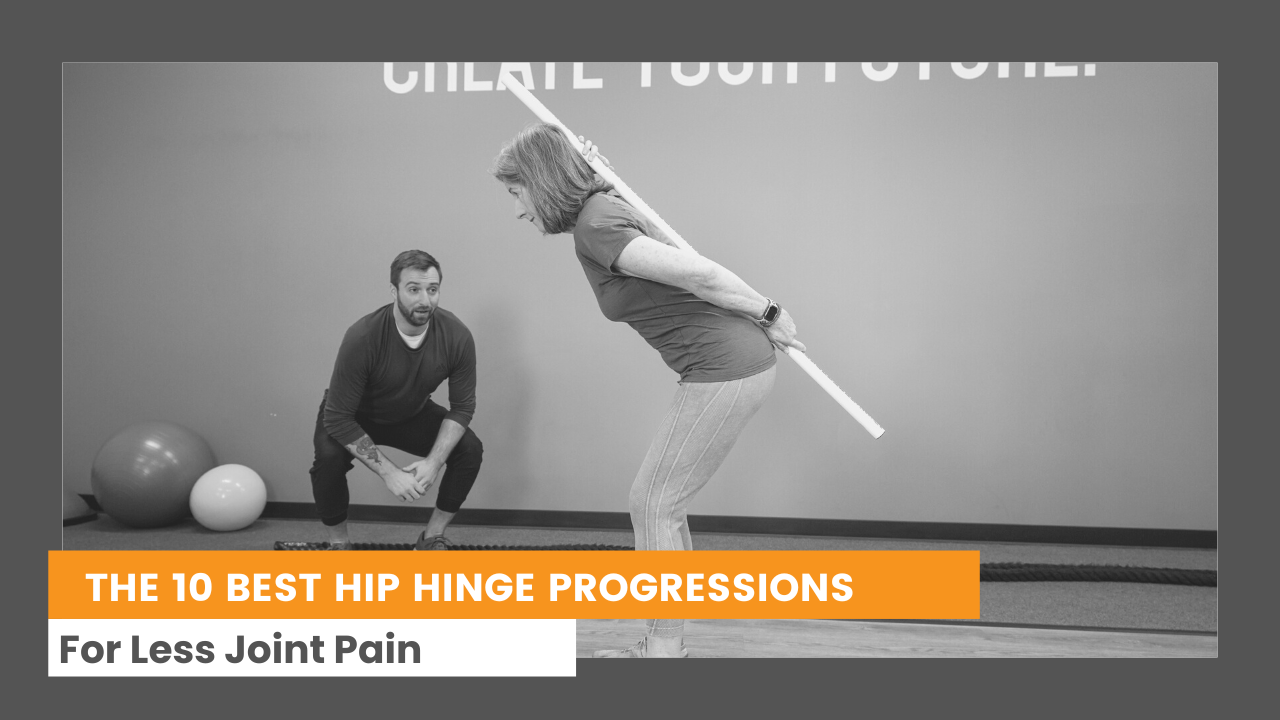
3. The Hip Hinge
Now for the traditional hip hinge. Focus on keeping a neutral spine thoughout movement. Reach the hips back, keep your spine neutral, and stop the minute you feel tension in the hamstring to avoid rounding your spine. Using a PVC/broom along your spine can help learn this movement.
Read More About Keeping A Neutral Spine Here
4. The Hinge To Squat
Keep in mind, the hinge is NOT a squat. The hinge is reaching your hips back. The squat is getting your hips down. The Hinge to Squat exercise allows you to differentiate the two movements while further ingraining the hip hinge patterning.
5. The Banded Hip Hinge
Further ingrain the hinge and start building strength by adding resistance. The Banded Hip Hinge helps you FEEL the tension in your hamstrings so you will know just where to stop the movement.
6. The Weighted Hip Hinge
Add heavier weights and begin transitioning to more functional movements (like the lift) with the weighted hip hinge. Think of the weight pulling you straight down while you reach your hips back, stopping when you feel tension in your hamstring.
7. The Elevated Kettlebell Lift
Similar to the weighted hinge only now you're starting with the weight from an elevated surface. The Elevated KB Lift is a great movement to help us transition from the hinge to the lift.
Learn More About Transitioning Your Hinge To A Lift Here
8. The Kettlebell Lift
The deadlift is the next hinge progression and is one of the best ways to start building hamstring and glute strength. Because the weght starts on the floor we must learn to use our knees while hinging and keeping a neutral spine.
Learn More About How To Perform The Kettlebell Deadlift Here
9. The Banded Pull Through
Now time to practice the hinge and keeping a neutral spine during more dynamic movements. The banded pull through is a hinge movement used to generate power from the hips.
10. The Kettlebell Swing
The kettlebell swing is the perfect example of how you can progress the hip hinge to other fitness and strength movements. When done correctly, Kettlebell Swings help further engrain the hip hinge pattern while also teaching out bodies how to generate power from the hips.
As you can see, for such a simple movement there is a lot to think about with the hip hinge and many ways you can use the movement to build strength - WITHOUT stressing your joints.
For the last 10 years I’ve been helping adults learn to solve chronic joint pain and maintain their lifestyle as they get older. I’ve put together a free, step-by-step program to help you get started treating your joint pain from home. Download your free copy of ‘Solving Pain With Strength’ at the link below.
