
Can't Do Lunges Because Of Knee Pain? How To SAFELY Work Up To The Reverse Lunge
The Reverse Lunge is one of the most important movement for solving pain and maintaining your lifestyle as you get older. Benefits of the reverse lunge include improving balance, control, and strength to perform many of our day-to-day activities. But what if you can't do lunges because of knee pain? This step-by-step approach will help you build the strength required to perform the reverse lunge even if you're dealing with knee pain and arthritis.
Read More About The Benefits Of The Reverse Lunge
1. The Step Up (Low Height)
The path to performing the reverse lunge starts with a single step...literally. The Step Up Exercise targets the same muscles as the reverse lunge with little to no impact at the knee. Starting at a lower height allows you to build comfort and confident in the movement before moving on.
2. The Step Up (Taller Height)
The easiest way to progress the Step Up is to move to a taller step. Once you feel confident performing the Step Up at a lower height you can make the exercise more challenging by simply raising the height of your step.
3. The Weighted Step Up
One reason I love the step up exercise as a way to work up to the reverse lunge is that you can make it as challenging as you want. Adding weight to the step up (by holding onto dumbbells) turns this movement into a very effective strength building exercise.
4. The Assisted Split Squat
Once you feel strong and confident with the step up, we can start moving toward more traditional lunges. The split squat is a lunge variation where both feet are planted on the floor (so less balance and control is required). Using assistance (like the TRX Suspension Trainer) allows you better control of the movement. If you get stuck at the bottom of the lunge, simply use your arms to pull you up.
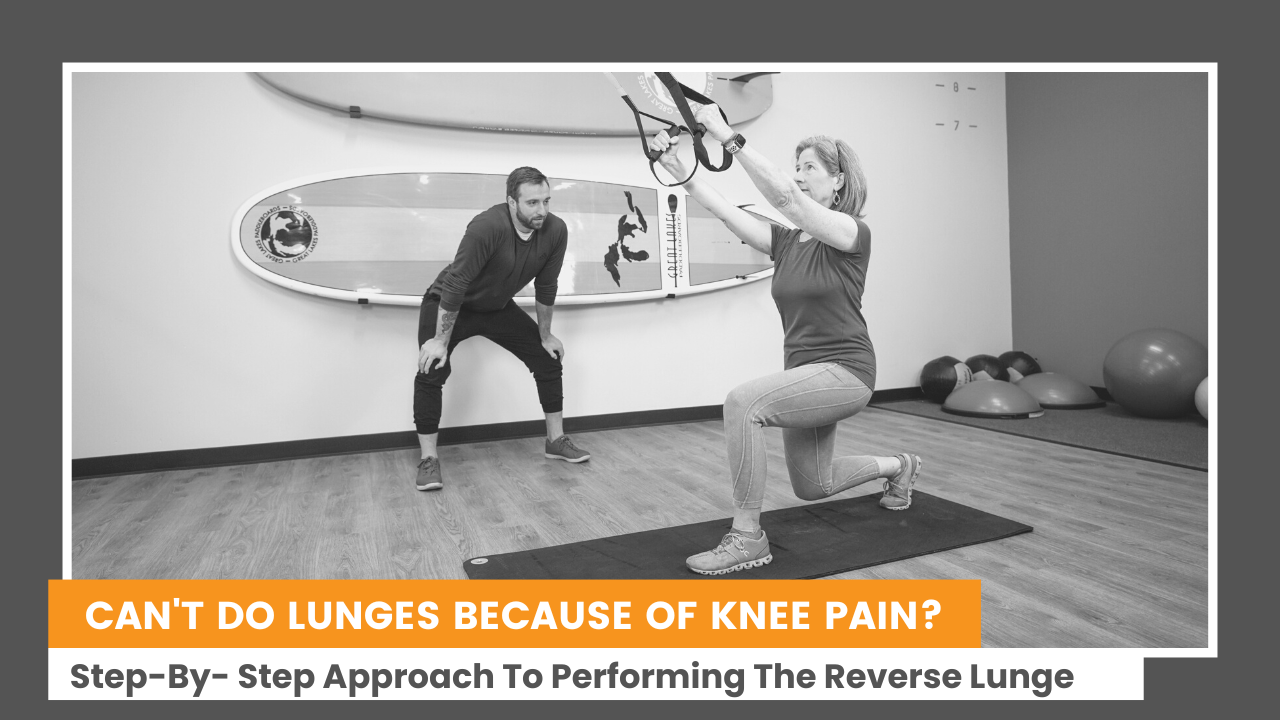
5. The Assisted Reverse Lunge
Now we can finally start practicing the reverse lunge movement. Similar to the assisted split squat, starting with the TRX Suspension trainer allows you to more easily control the movement for less impact at your knee. The goal is to practice and build strength until your arms aren't needed.
6. The Unassisted Split Squat
Once you feel strong and confident in each of the previous movements, it's time to get rid of the assistance altogether. Again, the split squat allows you to keep two points of contact to help with balance while strengthening your legs.
7. The Unassisted Reverse Lunge
You made it! When you feel. When starting the reverse lunge be sure to keep the movement SLOW and CONTROLLED. This will help improve balance and avoid aggravating your knee pain.
Click Here To Learn More About How To Perform The Reverse Lunge
If you've told yourself that you can't do lunges because of knee pain, I challenge you to take this step by step approach. Building comfort and confidence at each step allows you to SAFELY build the strength to work your way up to the lunge.